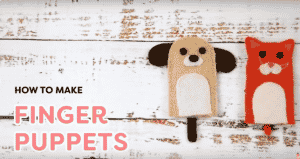
If you have little ones at home or are looking for something fun and easy to pass the time, we have a neat craft that you just might like. Whether you have pets or not, you may know they can be a bit messy. Making these cat and dog finger puppets is a way to create the pets with no additional clean up!
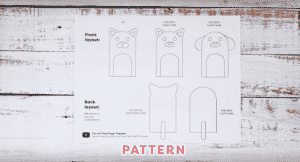
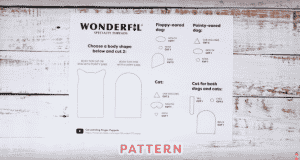
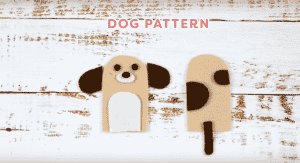
To get started you can download our free pattern here: https://bit.ly/3bAcYxG. It will look as pictured below:
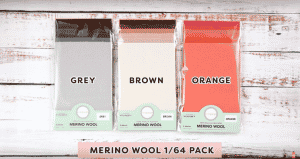
Once you cut out all of the paper pieces then keep them organized for each animal. Next we are going to get our wool ready. We recommend using Sue Spargo 100% merino wool packs in size 1/64, with colors grey, brown, and orange. These come with an assortment of colors in the perfect size for your finger puppets. If you want to purchase these packs from home you can follow the link: http://shopwonderfil.com/product/merino-wool-packs
Next thing you are going to do is cut out your pattern pieces out of the wool in the color combinations of your choice. We pinned the pieces to the wool to keep them in place while cutting. We chose to do a medium tan for the body, light tan for tummy and snout, dark brown for ears, spots, and tail, and then black for eyes and nose. The outcome is pictured below:
Next we are cutting the cat out. We used a darker orange color for the body, a light tan for the tummy and snout, pink for the ears and nose, dark brown for the stripes, and then black for the eyes.

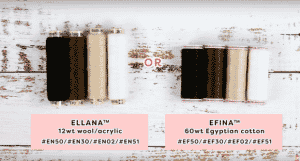
In order to assemble these finger puppets we need thread. There is a thread line that actually comes in all matching colors to the wool, called Ellana which is a thicker thread, and then there is also a thread line called Efina that will also do the job well and is a much thinner thread. We suggest either, as they are both excellent threads and will help you effortlessly create this project and perhaps many more in the future. Whichever thread you chose we suggest the colors 50, 30, 02, and 51. These are all quite basic colors and are great to have on hand for any projects. The threads we recommend are pictured below. You can also purchase by stopping by here for Ellana: http://shopwonderfil.com/product-category/ellana
And here for Efina: http://shopwonderfil.com/product-category/efina
To sew the puppets, you are going to want to hand applique all of the details on the front and then the back before sewing the sides. You can do any stitches you want, if you are new to sewing you may want to try a running stitch, which is just a standard in and out stitch.

(https://en.wikipedia.org/wiki/Running_stitch)
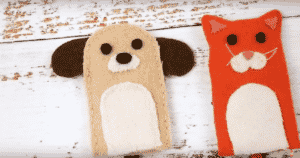
Or you can try something a little fancier such as a blanket stitch, like we did on the belly of the dog.
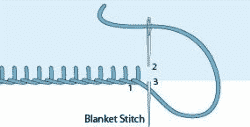
(https://www.dmc.com/us/p-embroidery-stitch-guide.html#null)
Once you have the details all stitched on then we are going to do the sides. For the dog you can insert the ears into the sides because we are going to enclose it into the seam.

We used Wonder clips to hold the ears in place while we started stitching.
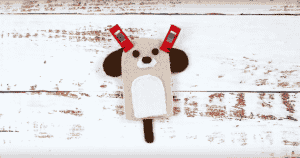
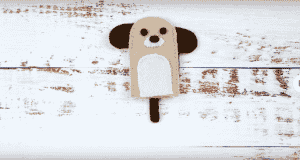
Next you can do any stitch you like to close the sides. We chose to do a back stitch, as this will also easily keep the ears in place as well. When you are all done it may look something like pictured below:
The cat’s ears are just part of the body and do not need to be enclosed, so once you sew the details on you can sew around the outside and it is all done. We also chose to add a little extra decoration and gave it whiskers with a few little strands of thread around the nose. The final puppet will look something like this, but you can choose how to decorate yours however you choose!:
We hope that you enjoyed making this project! Everything is open to interpretation and we would love to see how yours turned out. Time for a finger puppet show! Tag us on Facebook @wonderfil, instagram @wonderfilspecialtythreads, or using the hashtag #wonderfil. Happy crafting!