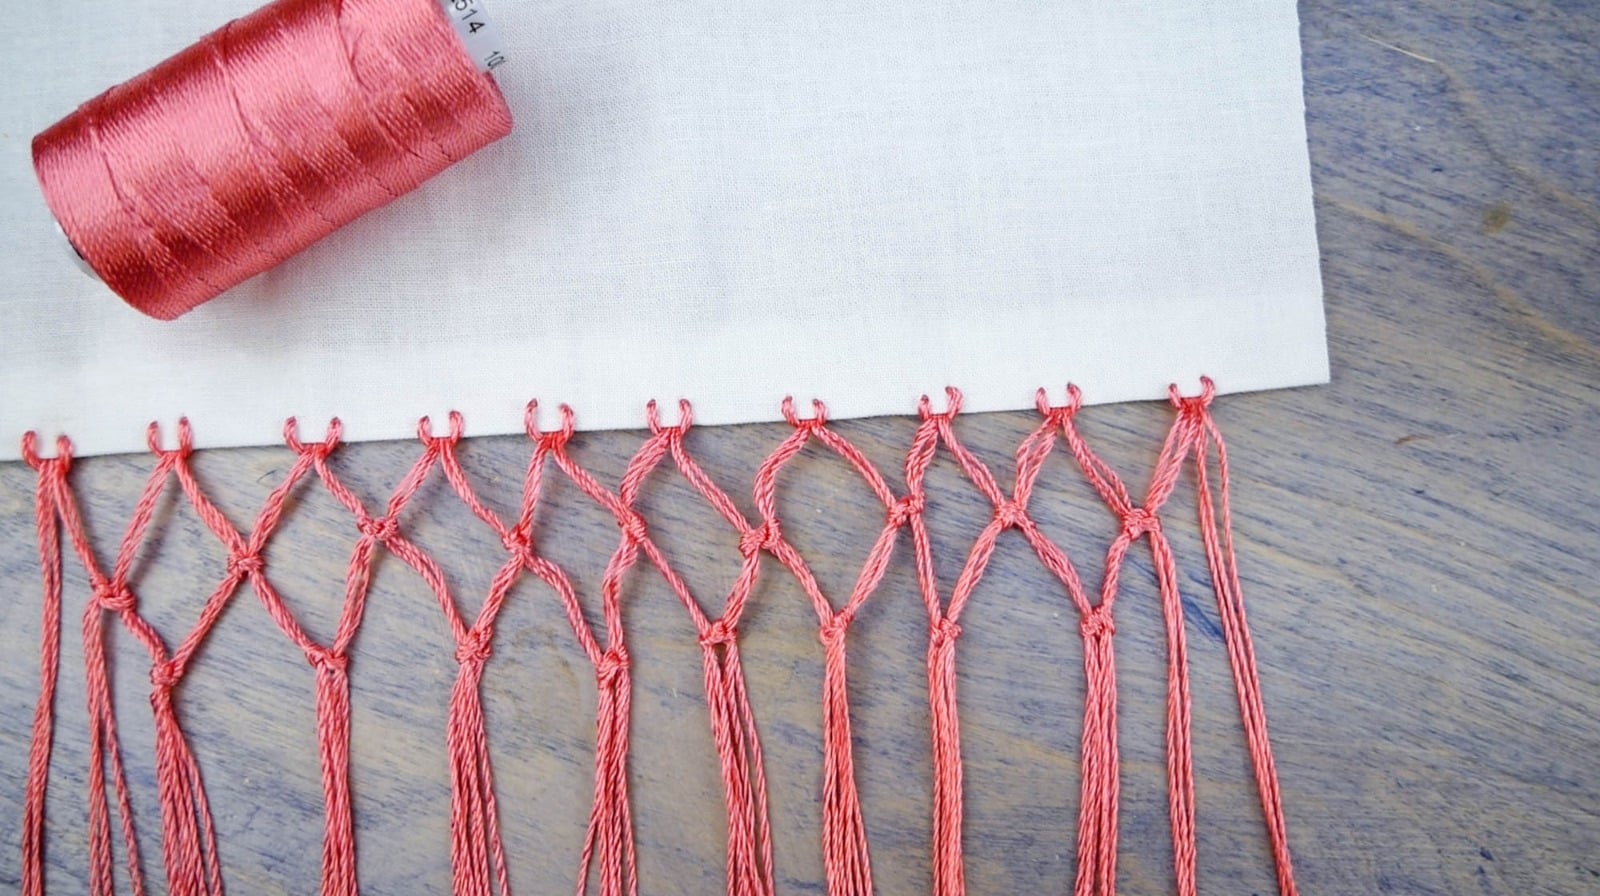
Fringes are an easy and beautiful way to decorate a variety of DIY projects. Add them to scarves and shawls, blankets, home décor, clothing, bags or really any project that will hold a stitch. This is the perfect way to add a totally unique look to just about anything you want to add a personal touch to.
In this blog, we’ll show you step by step how to make a knotted fringe, along with the materials you’ll need to create it. Want to follow along with us? Click to watch the YouTube video below for a more detailed tutorial you can follow along with!
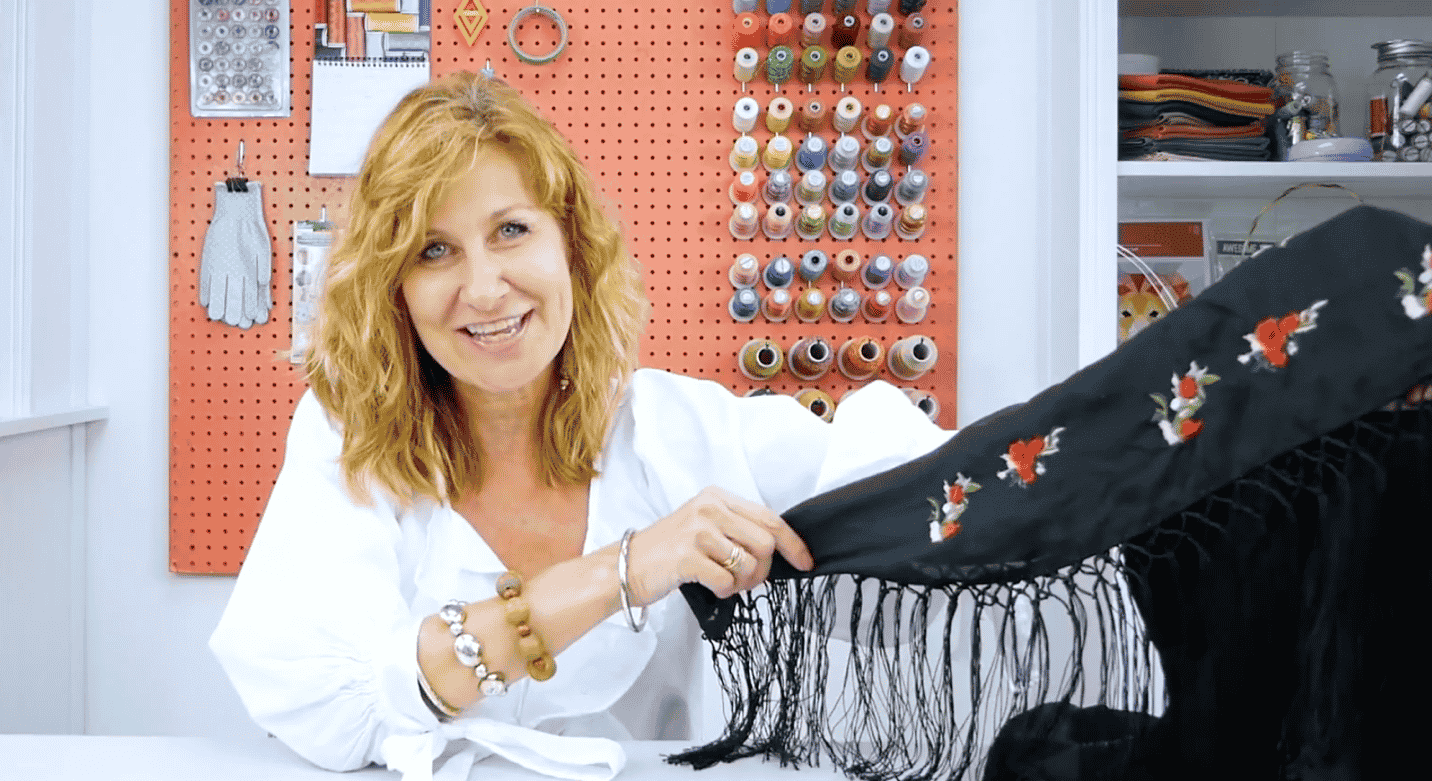
Here are the materials you’ll need:
- A hand sewing needle with an eye large enough to thread three strands of your chosen thread through.
- A thimble, especially if you’re planning on your fringe to be quite large.
- A small bowl of water. This is helpful for knotting your rayon threads securely. We’ll show you this tip further in the blog!
Choosing your thread:
We chose to use a thread line called Razzle, an 8wt 100% rayon thread, in this tutorial. Rayon has a bright and shiny lustre that is soft to the touch, making it ideal for use in clothing or other accessories that sit against the skin.

Click here to shop Razzle 8wt rayon online or to find it at a retailer near you: https://shopwonderfil.ca/product-category/razzle
You can also choose to use a cotton thread, such as Eleganza perle cotton, for a matte look. We recommend choosing a low lint cotton like Eleganza to give your projects a clean finish as most yarns will have a halo of lint around it. If you choose to use cotton, you won’t need a small bowl of water as this thread will carry enough friction to hold the knot tightly.

Click here to shop Eleganza 8wt long staple Egyptian perle cotton online or find it at a retailer near you: https://shopwonderfil.ca/product-category/eleganza
1. Starting your fringe
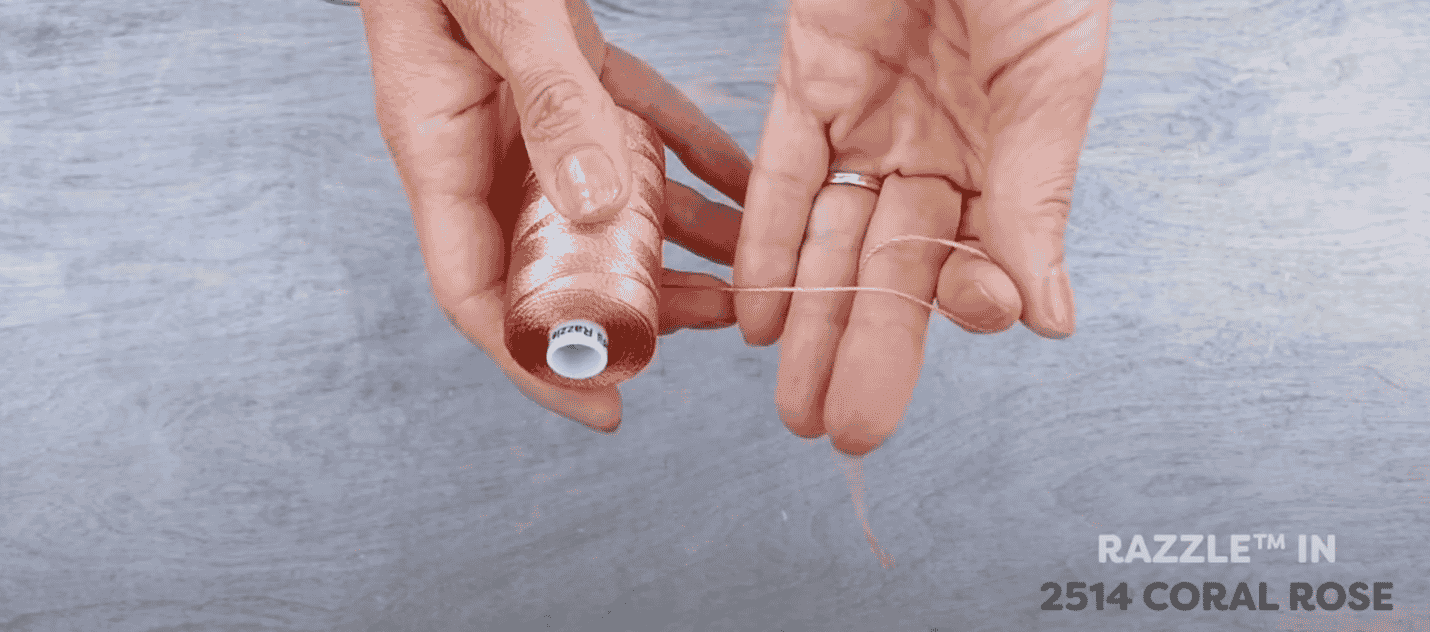
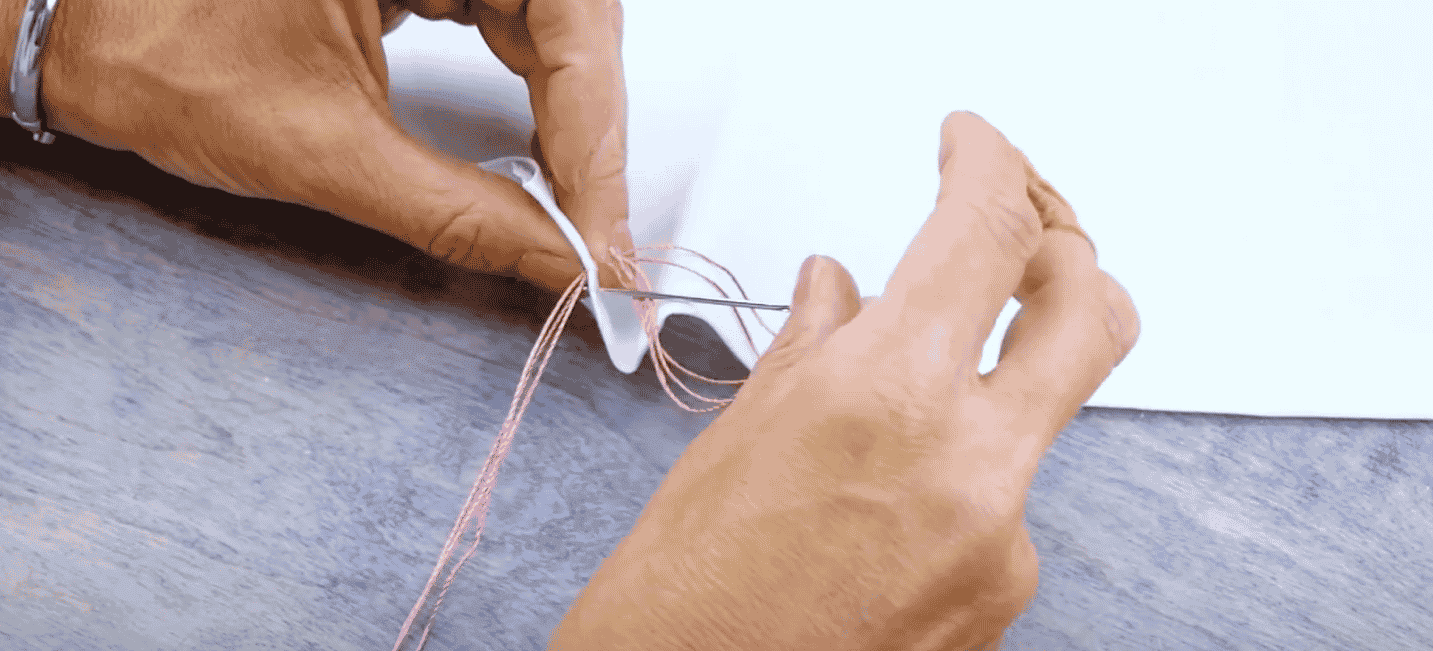
If like us, you’re planning on doing only one two sets of a diamond-shaped knotted fringe, then cut three strands of Razzle, about 18 inches long each, and thread them on your needle. Make sure you have them centered so the ends fall side by side. A fringe with more sets of knotting will require more thread, so add roughly 3 inches for each additional set of knotting you plan to do.
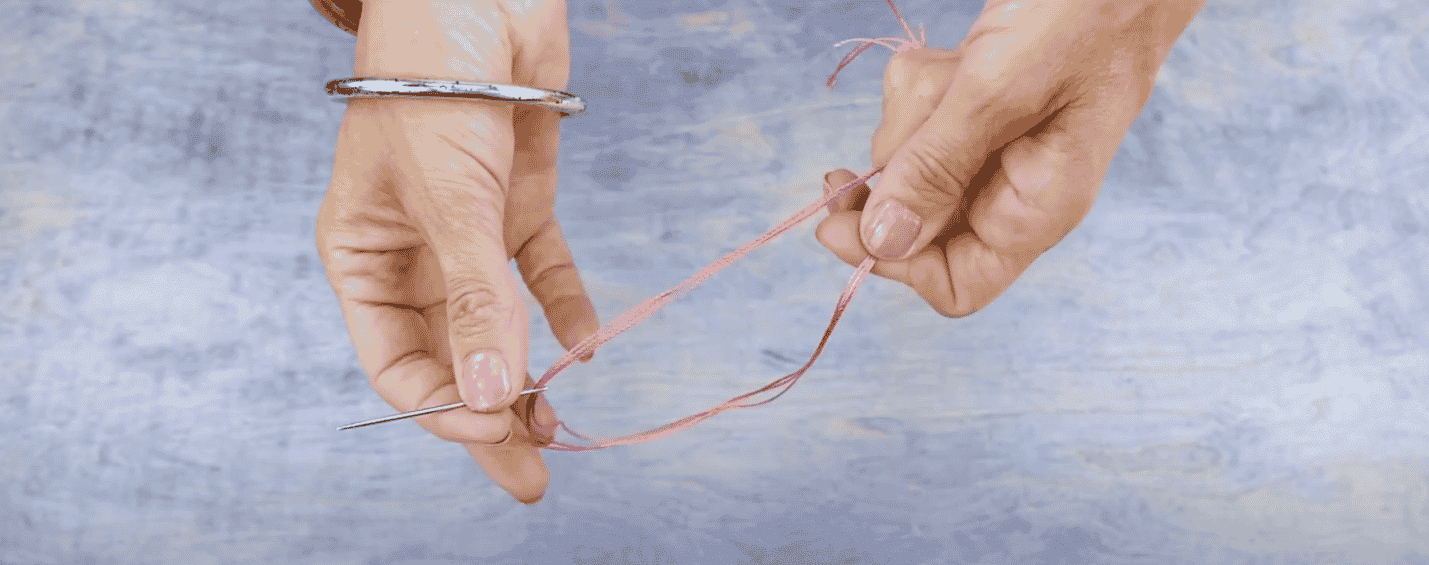
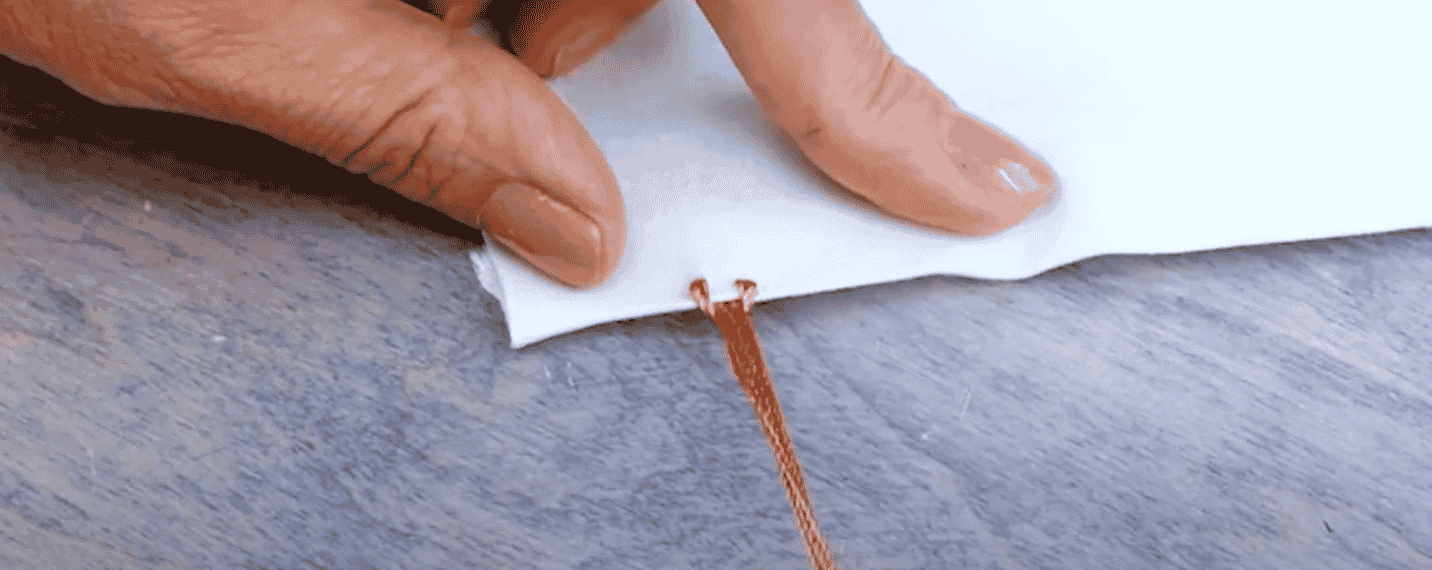
Going from the back of your work, take a short stitch through the front and then back to the underside of your edge. Even out the two ends, then pull both ends through the stitch. Space the stitches evenly apart along the edge of your work. We placed ours about 1.5 cm apart on this piece.
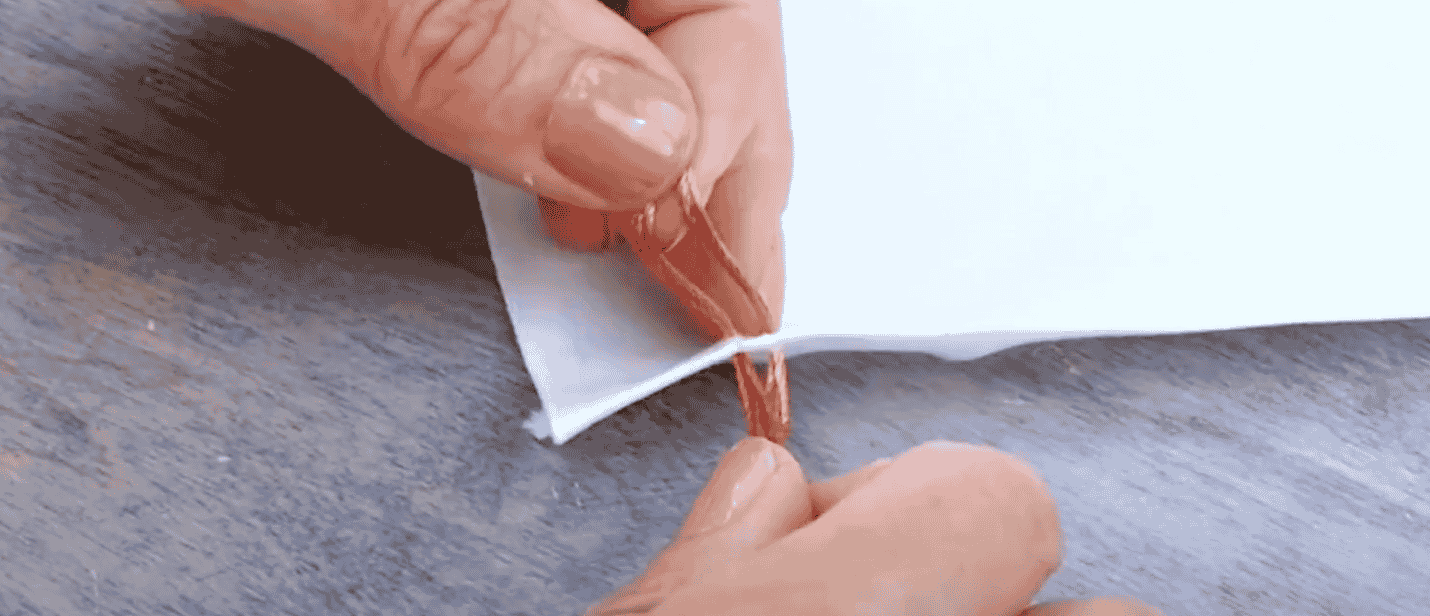
For an easy knot, simply create a loop, and run the thread up through it. Pull snug, but not tight so that you don’t pucker the fabric along the bottom of your fabric.
2. Knotting your fringe
After you’ve gone from one end of your edge to the other and you’re finished placing your fringes, you can start knotting them. Take three strands from the right side of one fringe, and three threads from the left side of the adjacent fringe.
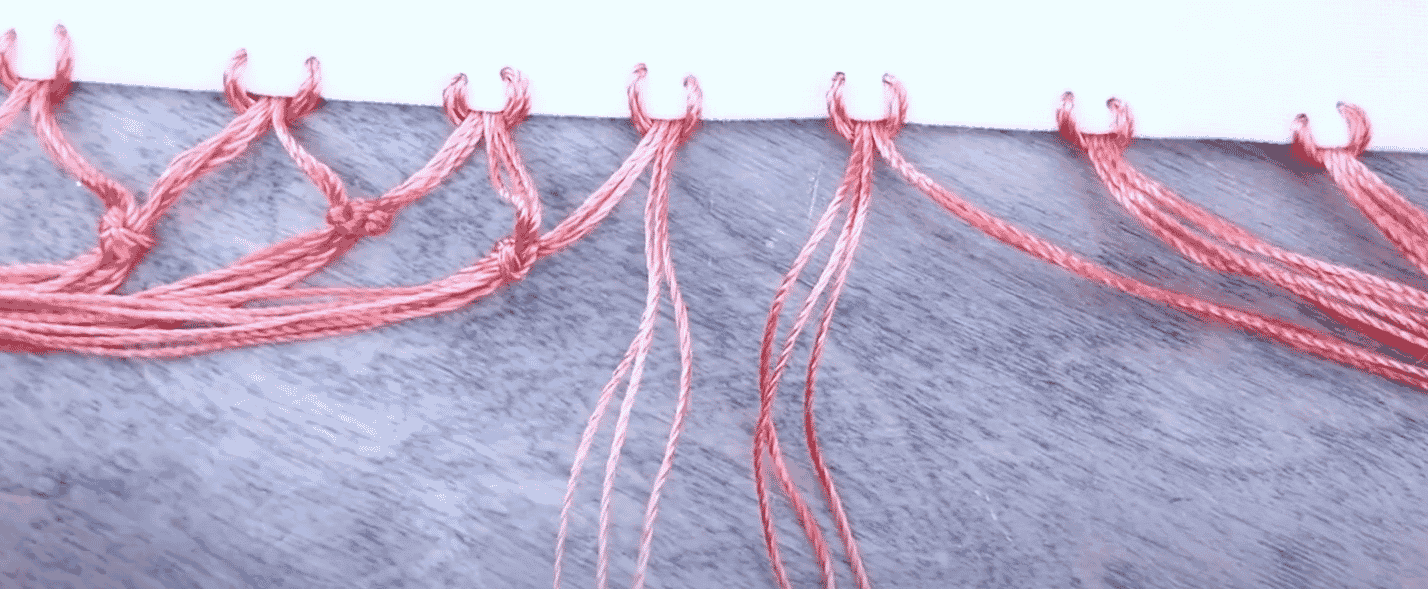
Pull the left threads over the top of the right, then under and back to the left, and then slip them through to make an overhand knot. Now take the threads on the right and tie them in an over hand knot.
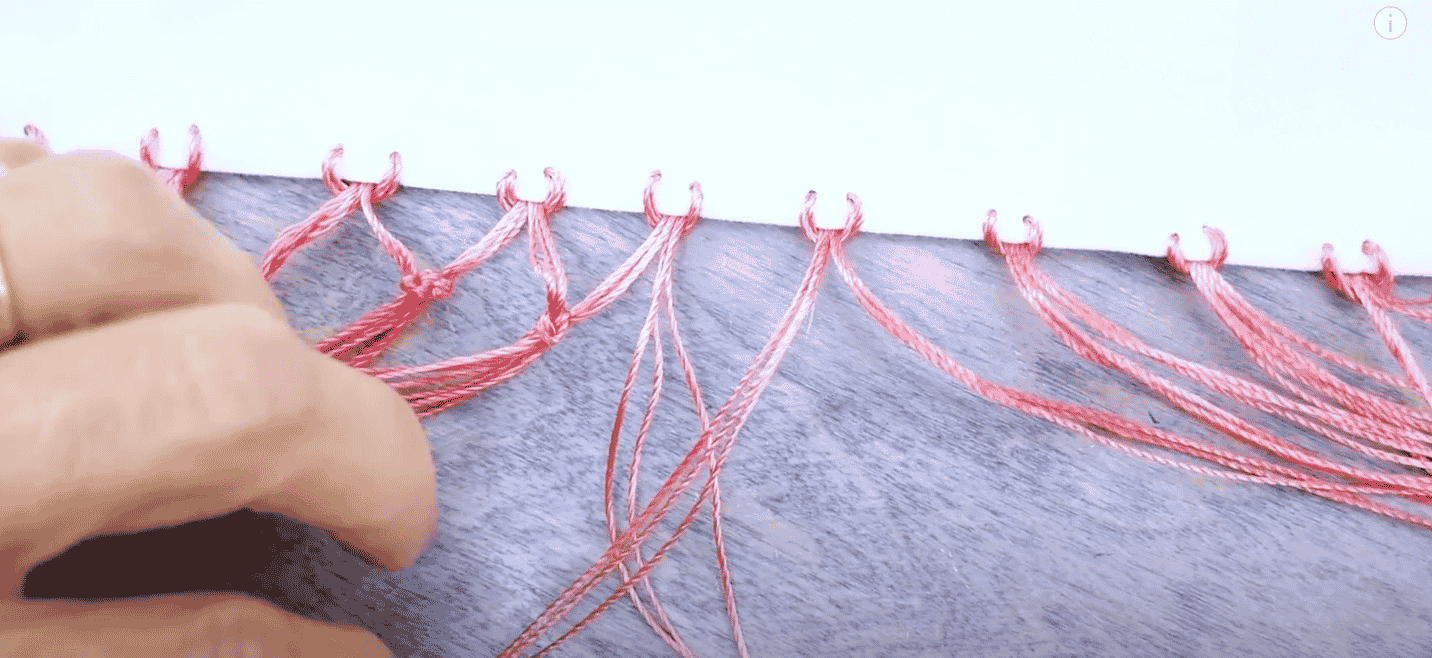
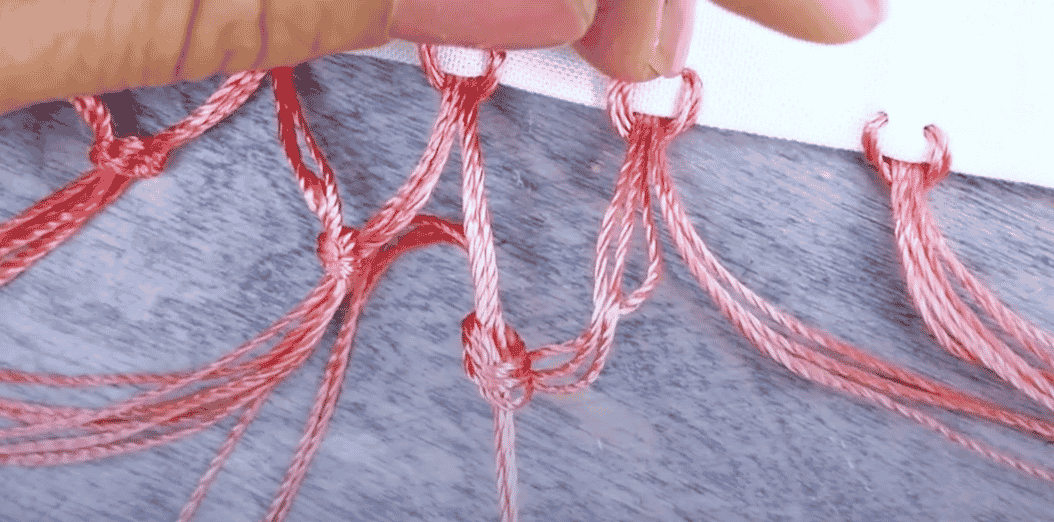
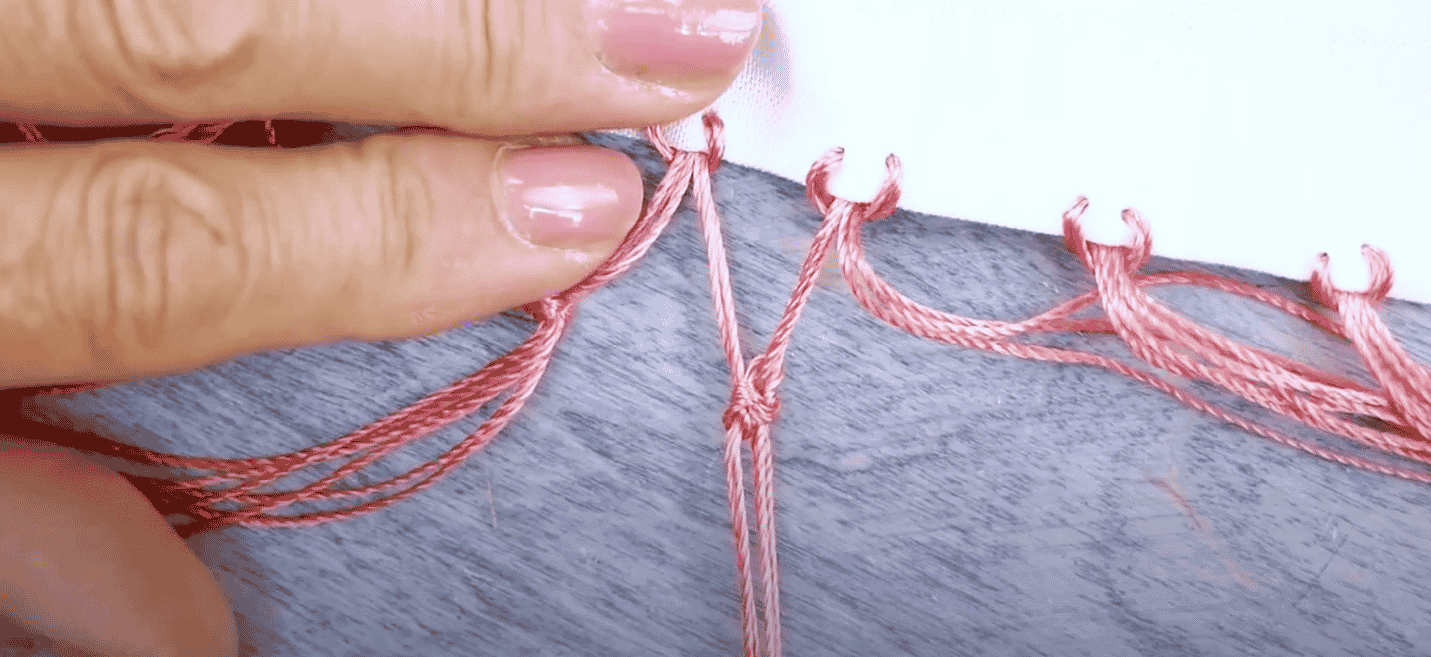
Work your way along in this manner, repeating the knots. Do another row, alternating the threads back to create a diamond shape. Try to keep your spacing as uniform as possible or your fringe will skew to the side. However, if you do make a mistake, you can always unknot and retie the knot again.
You can tie as many alternating layers of knots as you wish, depending on how you want it to look. If you plan to tie more rows, keep this in mind when measuring the length of your thread so you have enough space.
3. A tip to secure your knotted fringe tightly when using rayon thread
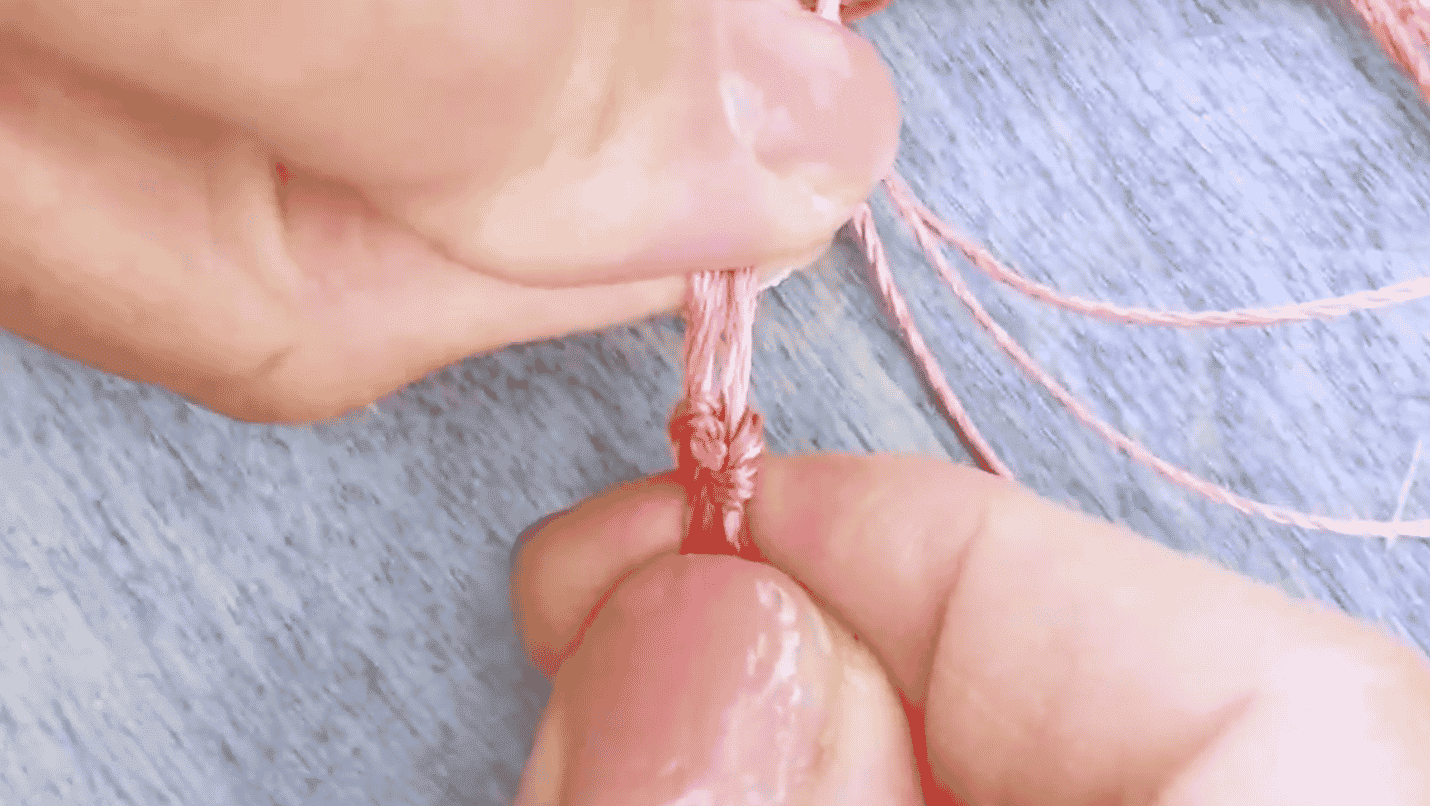
As rayon thread is very silky and slippery, here is a little trick to make the knots hold. Dip your fingers in a bowl of water, dampen your knot, then pull it tight. The dried knot will stay secure. Soon you’ll have a beautiful diamond shaped fringe.
4. Finishing your fringe
When your fringe is complete, a light steam will smooth out the curls and make it hang straight. If you don’t own a steamer, you can waft the steam from your iron around the thread strands and that is usually enough to straighten the fringe. Finally, lay your fringe on a cutting mat, and, with a ruler and rotary cutter, even out the edges. This is also your opportunity to shorten the remaining strands to the length you desire.
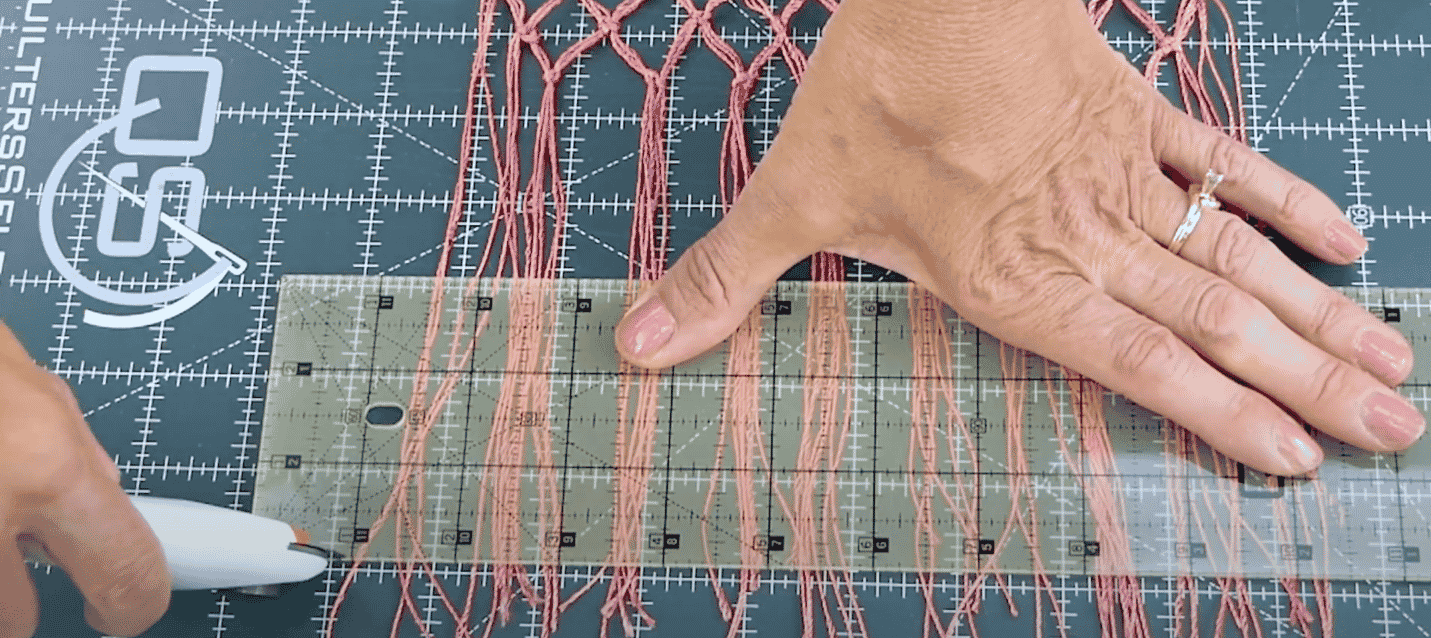

And there you have it! A fun fringe for all of your DIY needs. This is an easy way to add a fringe to a store-bought scarf, bag, or blanket. Get creative and add a knotted fringe to your projects and accessories for a unique, personalized touch.
Feeling like you need a little bit of Razzle in your life? You can shop the Razzle thread collection by visiting https://shopwonderfil.ca/product-category/razzle. Or head on over to www.shopwonderfil.ca to find a store in your area that carries WonderFil threads. You can also sign up for our free newsletter to receive more educational sewing tips, tutorials, and free patterns. Register by clicking here.
For more inspiration on how you can use a knotted fringe, check out this tutorial by Design Sponge to see how they used a knotted fringe to decorate a table runner! designsponge.com/2011/11/sewing-101-knotted-fringe-table-runner.html
You can also use this same technique to add a knotted fringe to the bottom of your crochet projects. Check out this easy tutorial by Caab Crochet: https://www.caabcrochet.com/how-to-add-fringe-crochet-project/

